This is the blog section. It has two categories: News and Releases.
Files in these directories will be listed in reverse chronological order.
This is the multi-page printable view of this section. Click here to print.
This is the blog section. It has two categories: News and Releases.
Files in these directories will be listed in reverse chronological order.
And I figured this was a great time to share. You know that salmon filet at the grocery store that comes on a cedar plank with a little tub of seasoning? You throw it on the grill, toss the seasoning on the salmon, and the brown sugar melts and caramelizes all over the salmon while the cedar plank imparts its own notes. It’s wonderful. Salmon in general is wonderful. You can brine and cold smoke it, brine and hot smoke it, skip right to smoking it, grill it, use lemon and pepper, garlic and butter… the possibilities are limitless.
The easy button in my house used to be the brown sugar option until my son decided that was too sweet. That means the maple syrup recipe I have will be too sweet as well. So, tonight I changed it up.
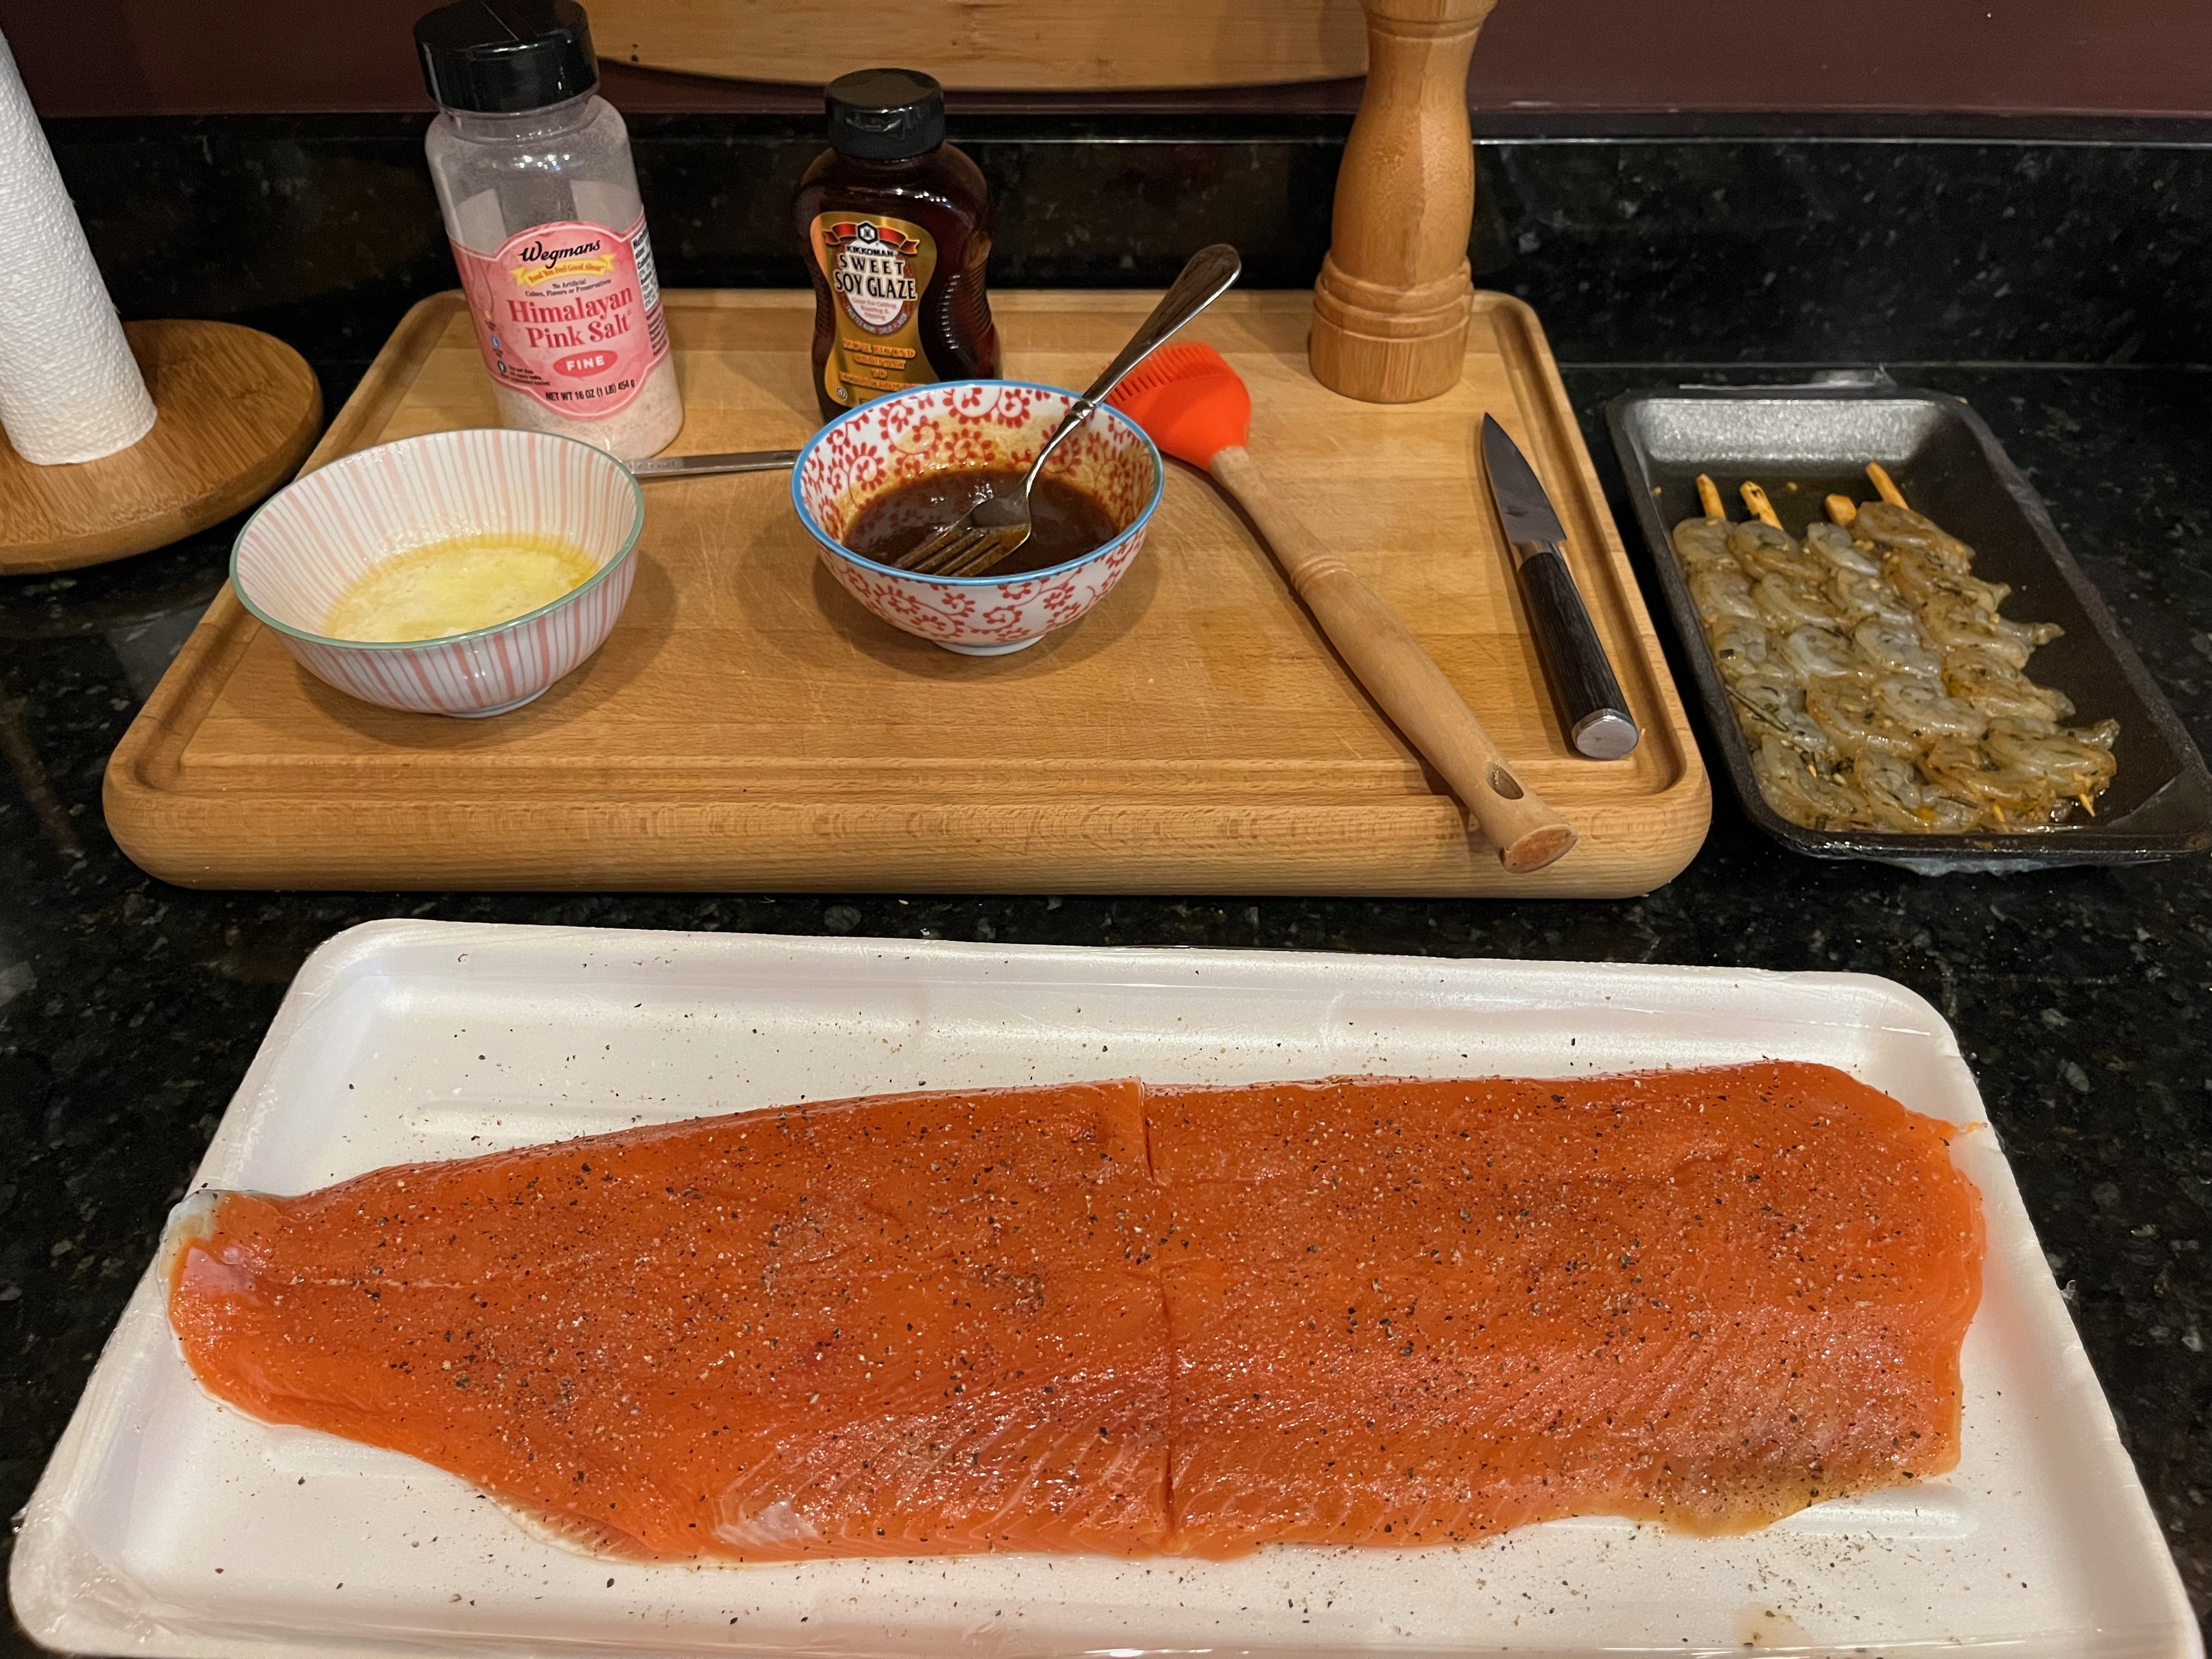
Farm raised fish are pumped full of hormones. Genetically engineered farm raised fish take about half as long to reach maturity and full size compared to their ocean counterparts. I’m sure all the crap that’s pumped into them are within FDA regulated limits, but still.
Maybe stick with wild caught salmon.
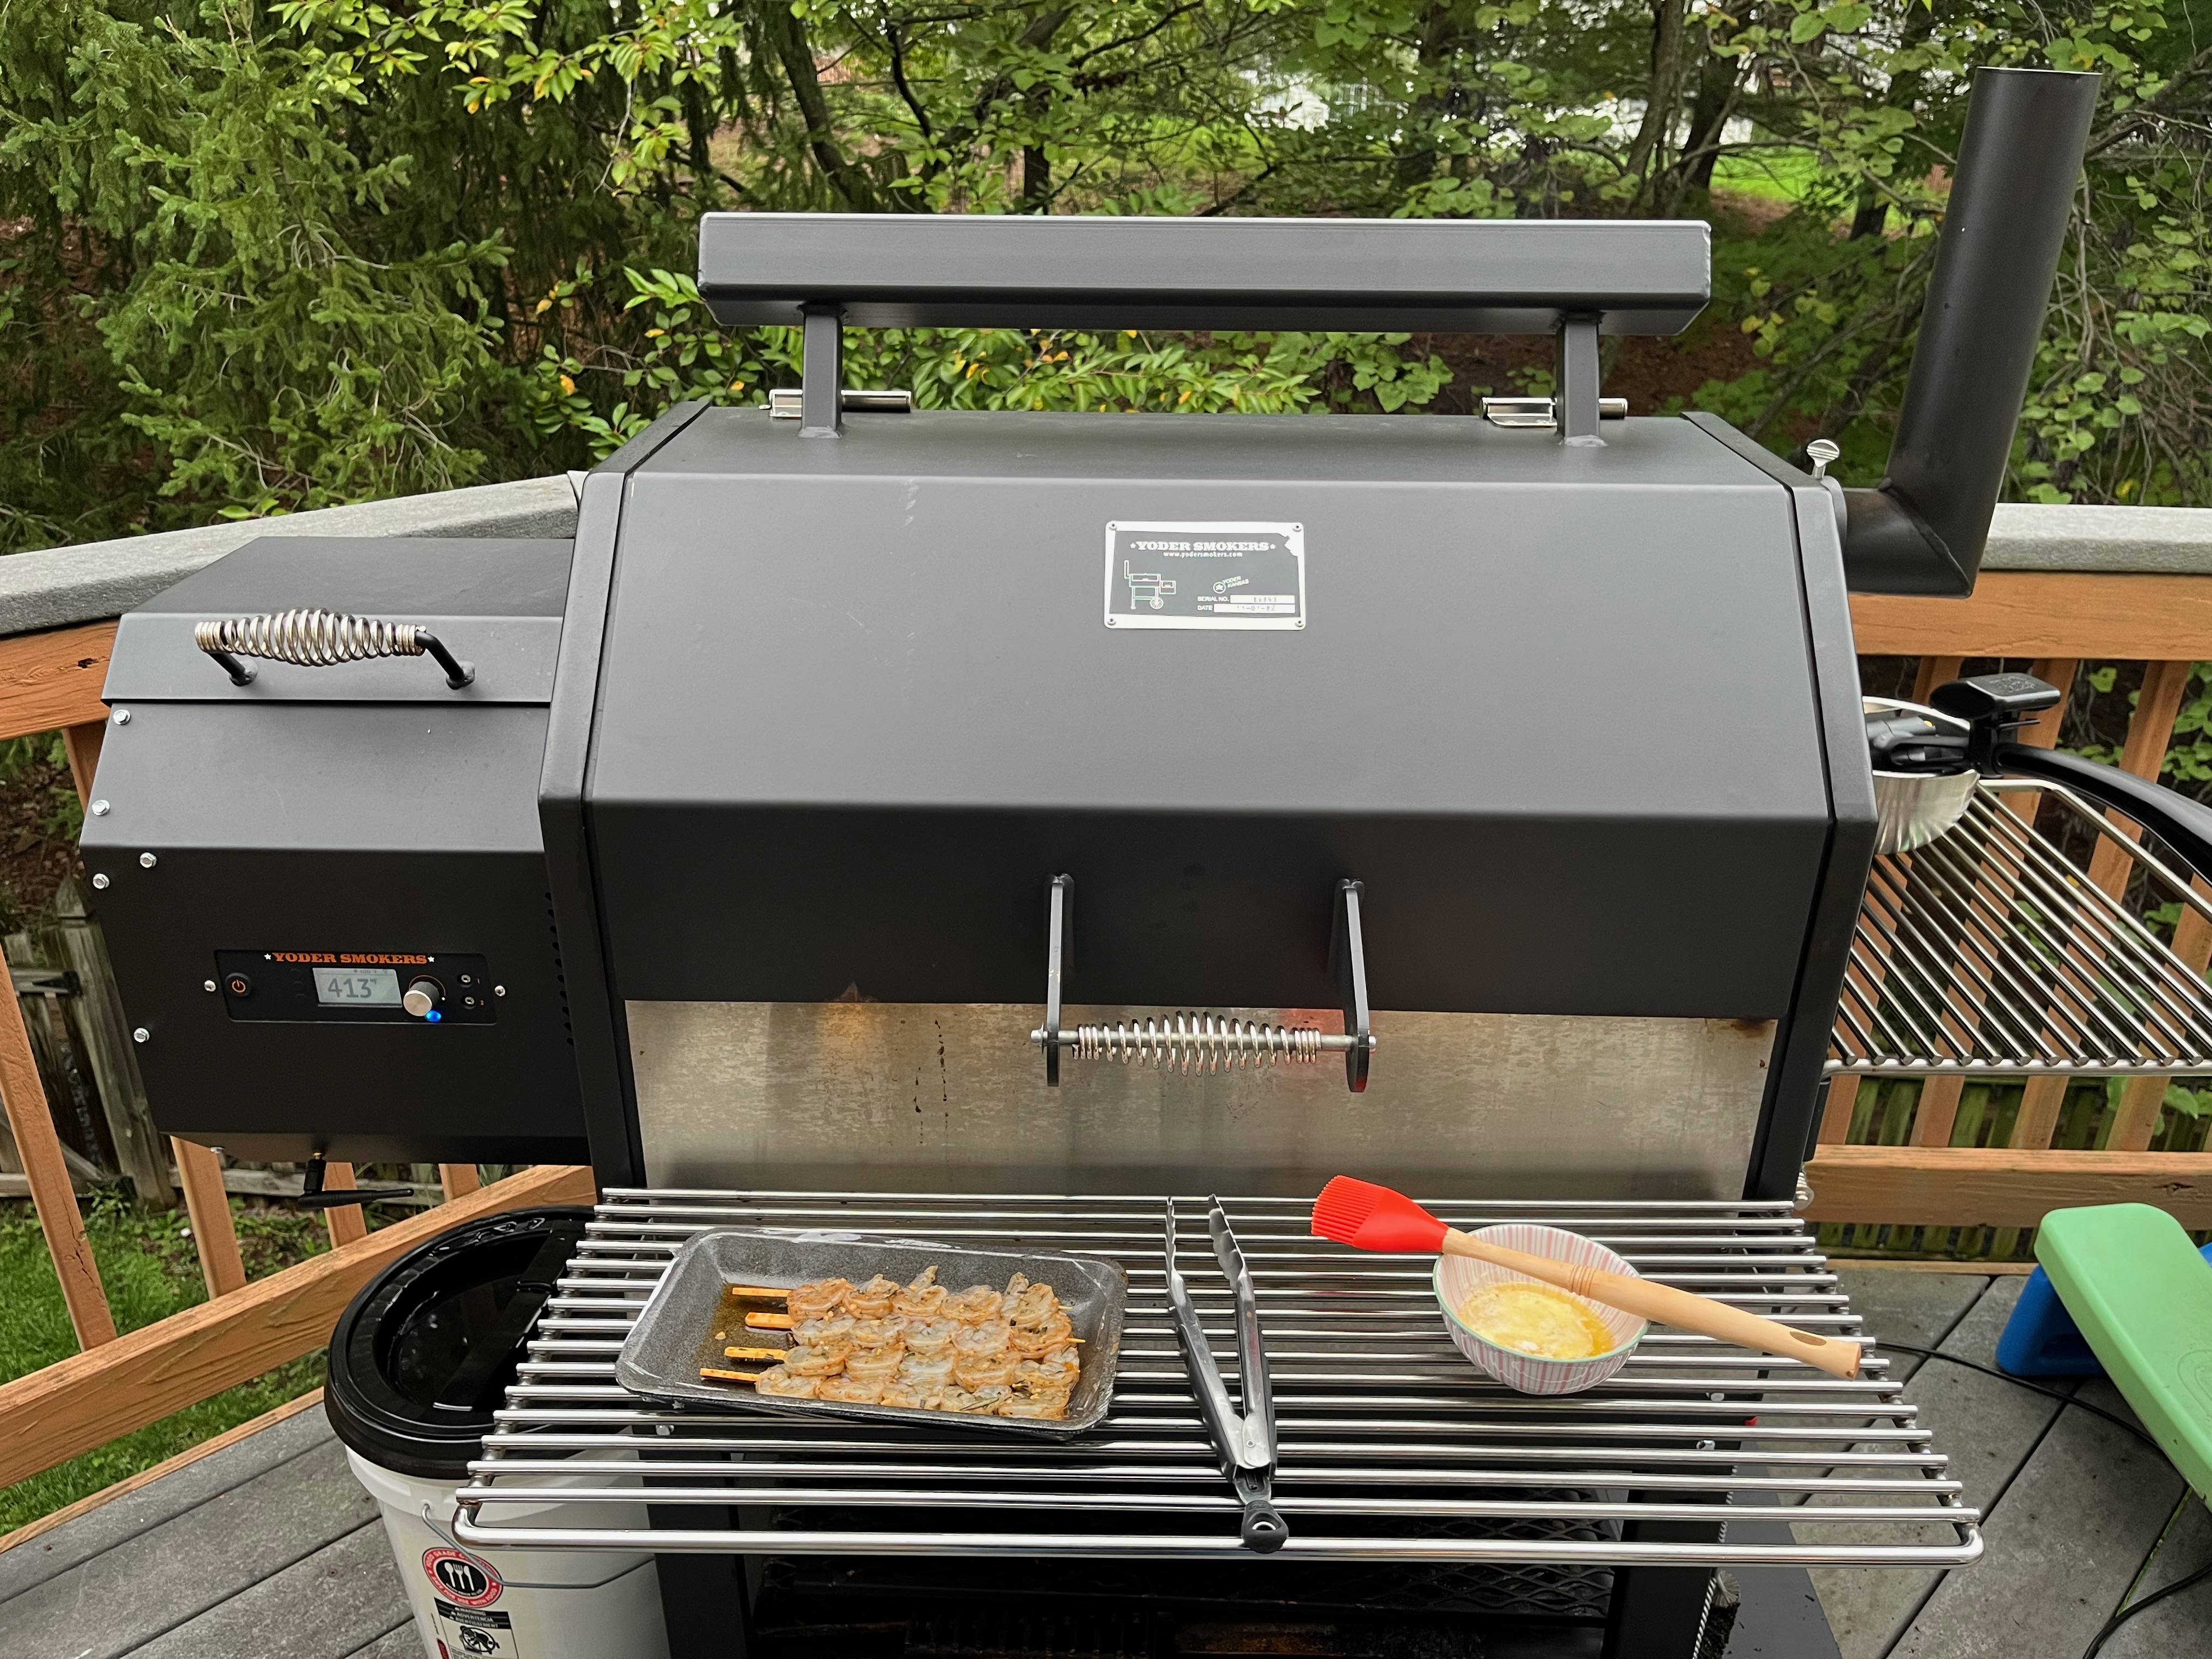 We’re grilling over an open flame. For this, I’m using the Yoder Smokers YS640S Pellet Grill because it has searing grates which can be placed directly over the open fire box turning this smoker into a wood fired grill.
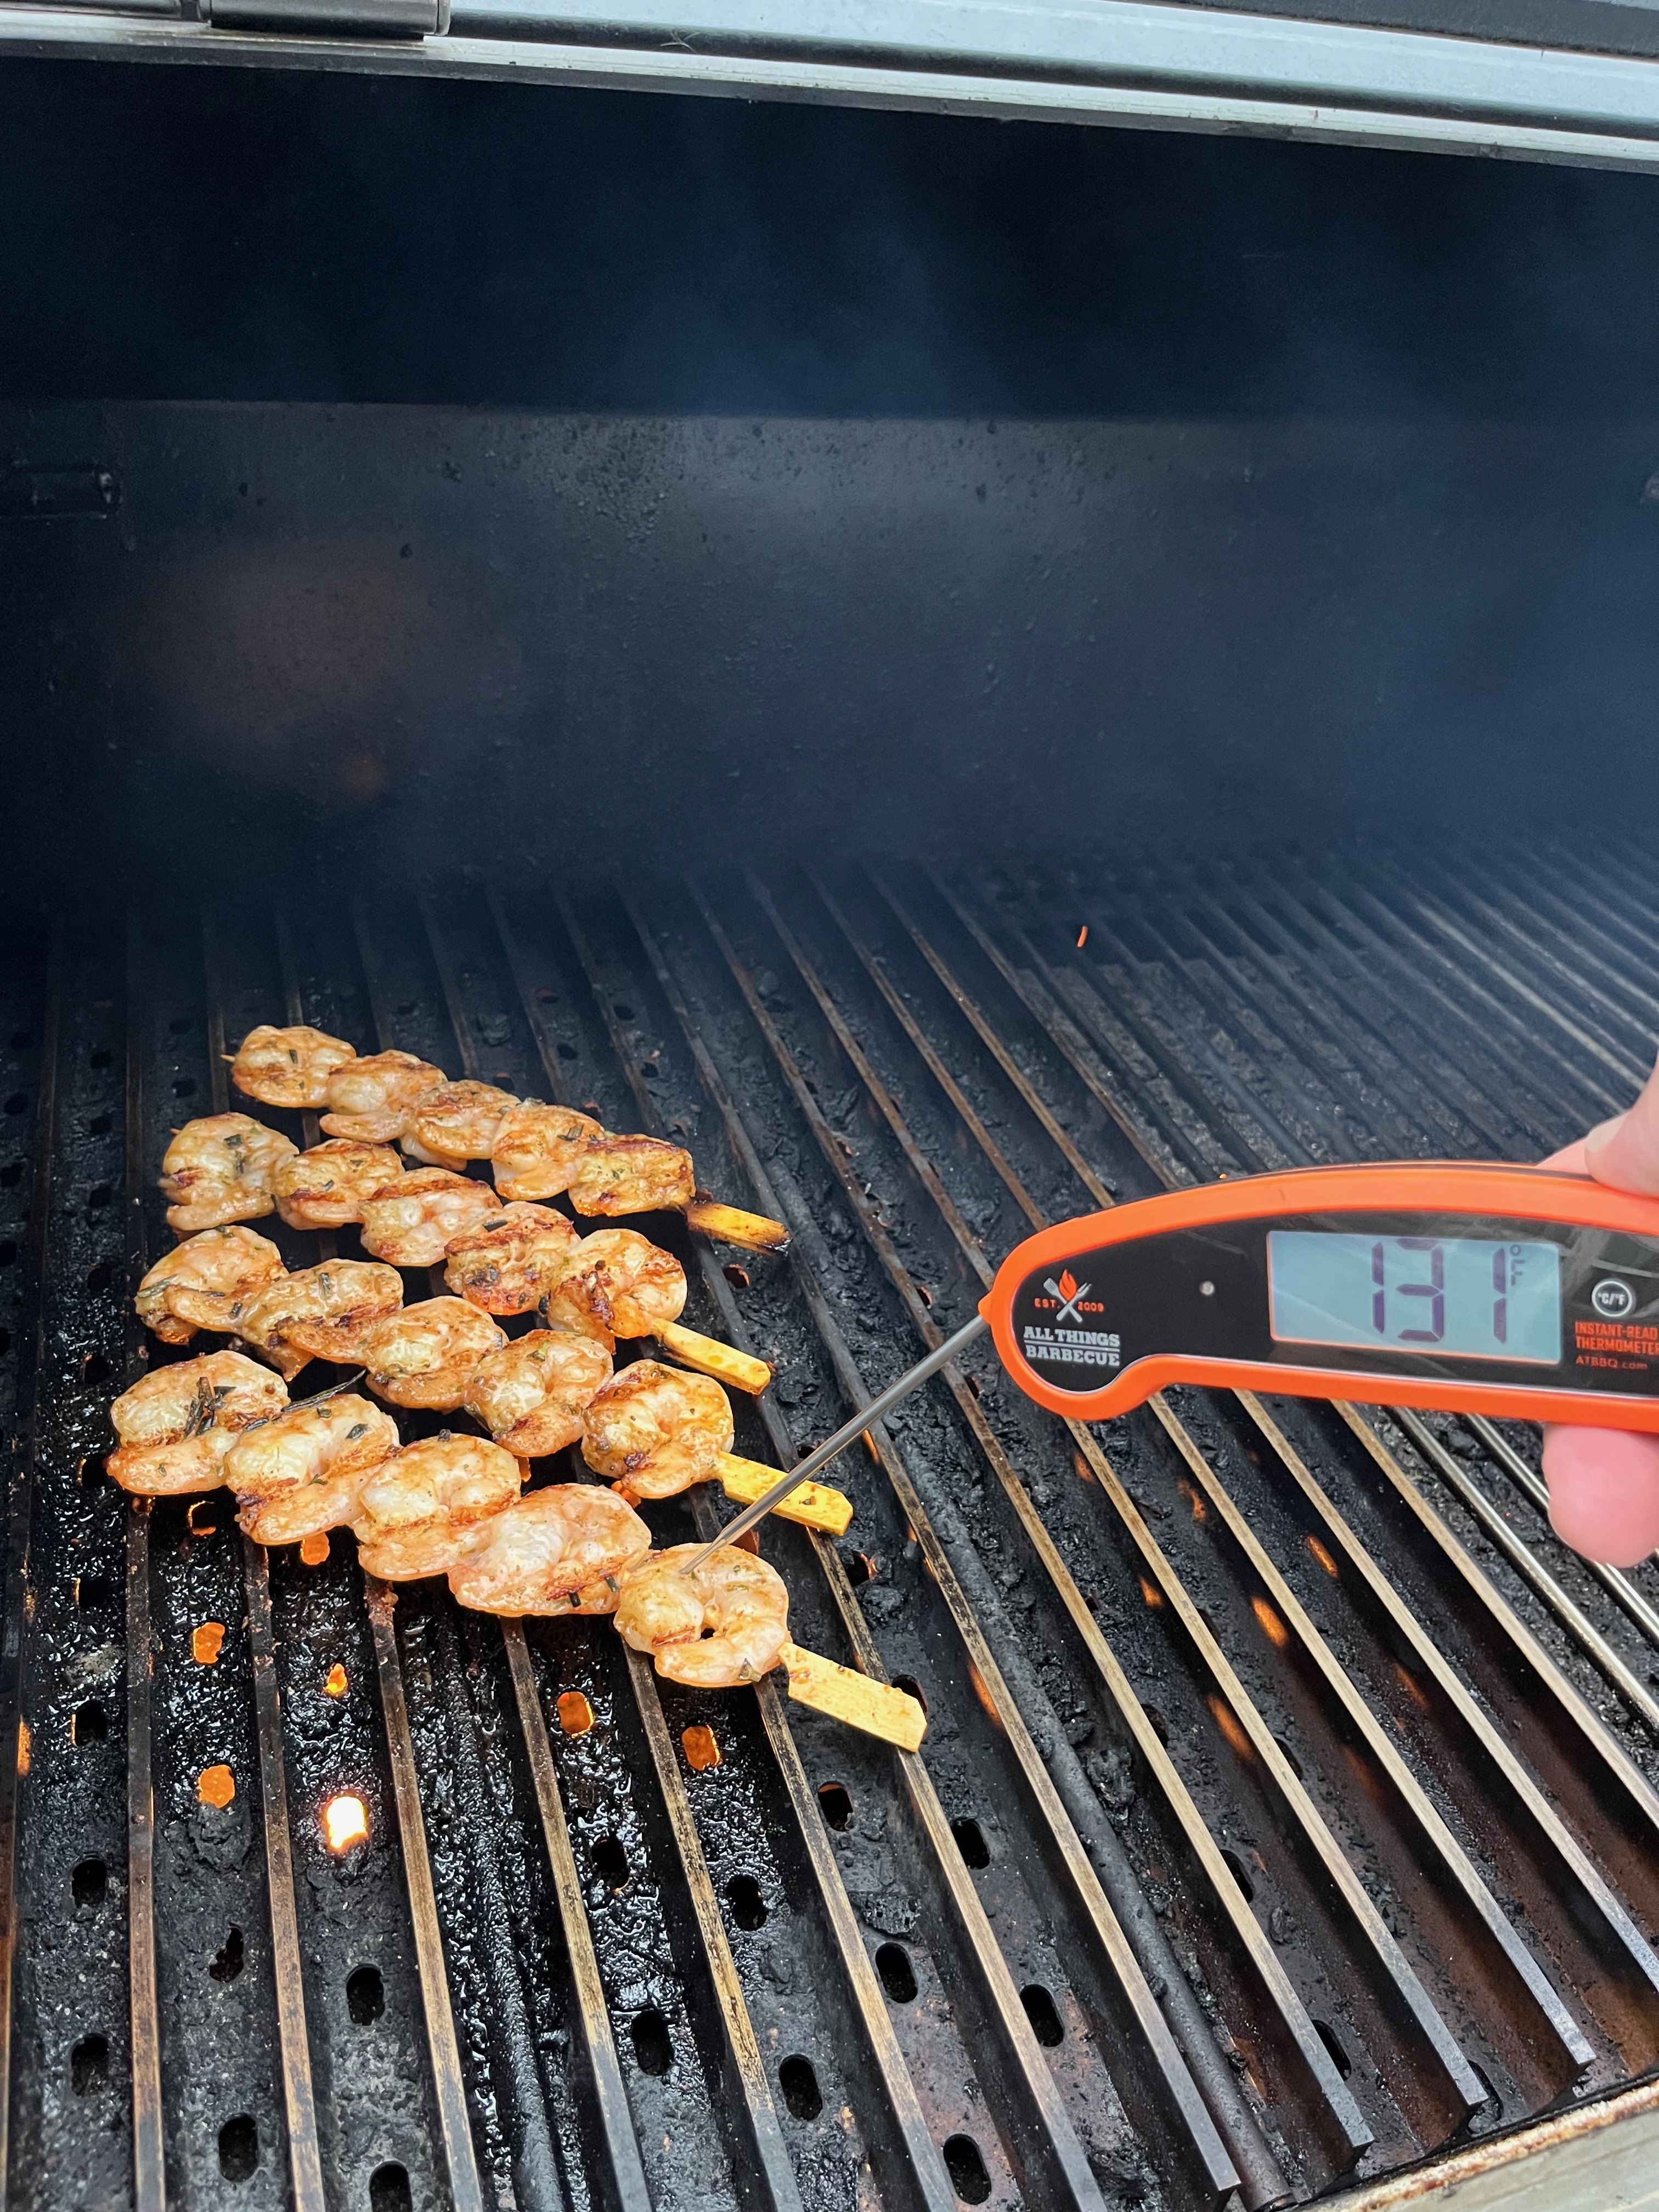 I tossed some shrimp on for a snack while the rest of the food cooked. FYI, normally I’d aim for pulling the shrimp at 120 deg. Anyway…

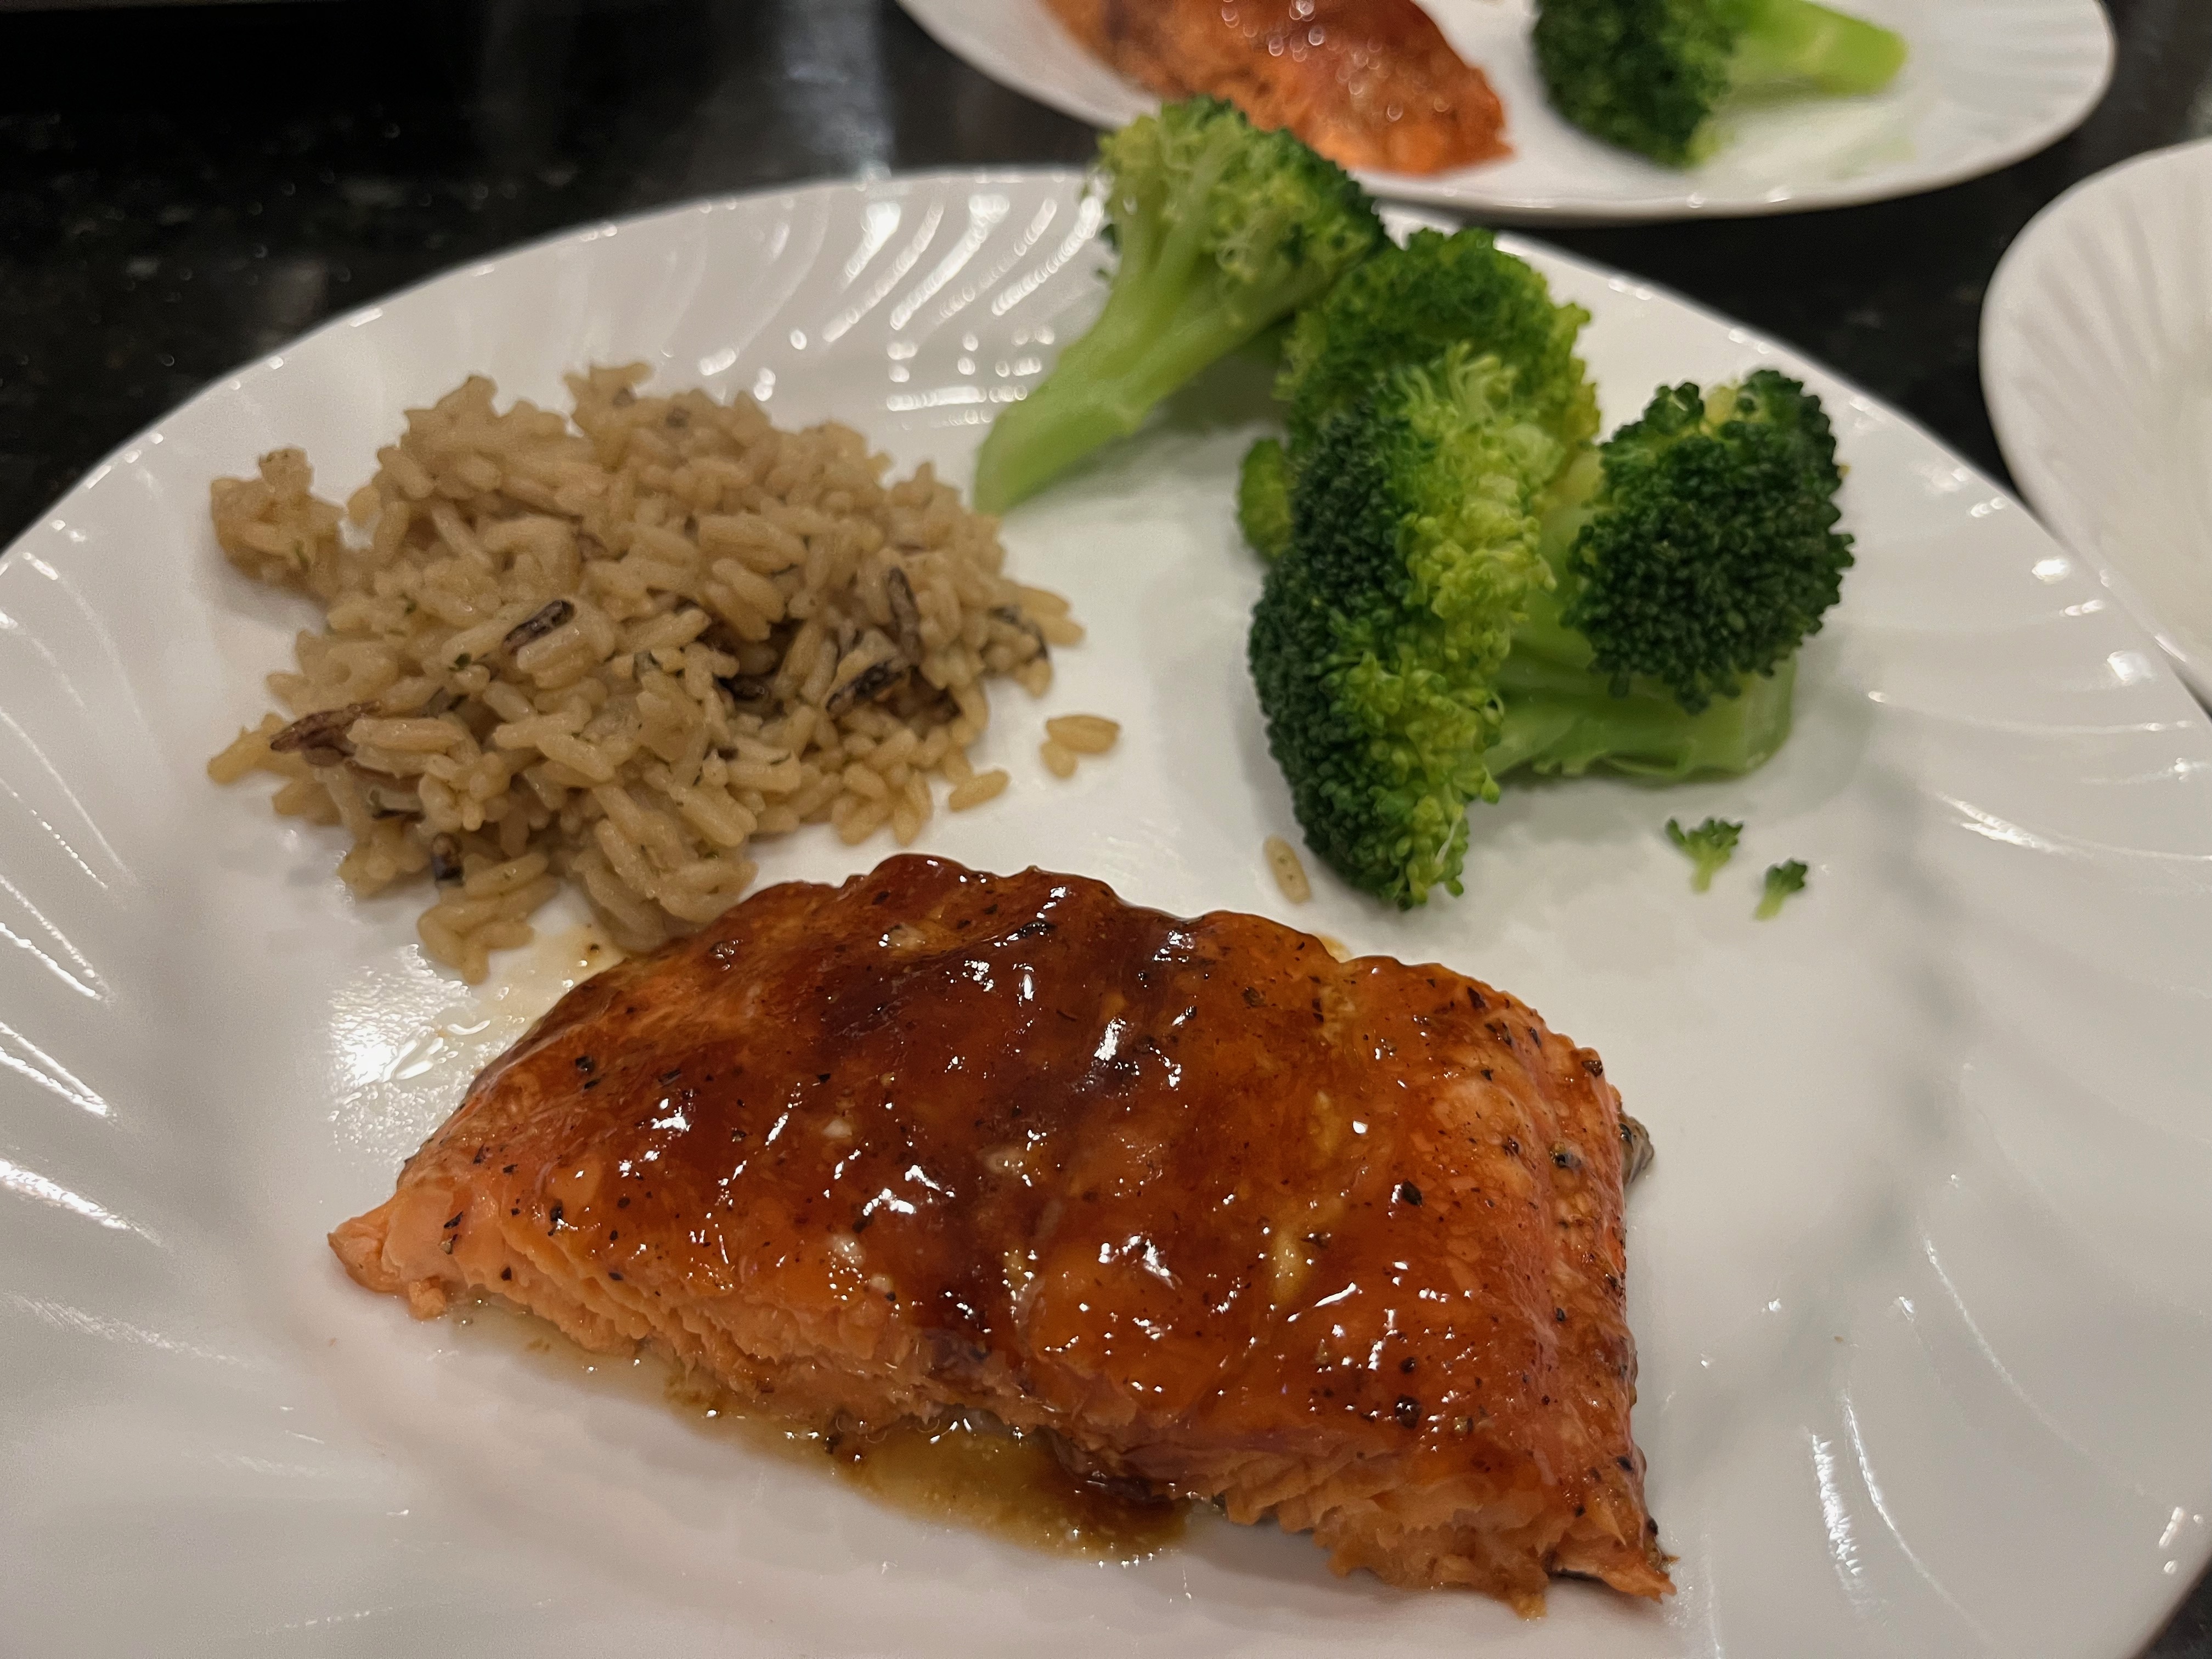
Dish up some salmon with a vegetable and starch of your choice, and enjoy!
If you walk into a coffee shop and see these red flags, do yourself a favor and just get a drip coffee.
As the fall season kicks into gear I find myself stopping by coffee shops along the bike trail more often. That little mid-ride treat becomes almost essential around the 30 mile mark. Serious cyclists know the value of caffeine dosing. It’s a major reason for the caffeine content in Gu. Nothing replaces the body warming feeling of a hot cup of coffee on a cold day. Those 60+ mile rides can be as much of a mental challenge as they are physical so little pick-me-ups can make all of the difference.
Each time I’ve stopped in a coffee shop, however, I’ve been horribly disappointed and have learned to look out for a few key indicators before choosing between an espresso based drink and a drip coffee. Save yourself some money and heart ache by watching for these red flags!
The portafilter is a chrome plated hunk of brass or bronze. The really high end ones are solid stainless steel. Why? Because that makes it a large thermal mass. Thermal mass, or thermal capacitance provides inertia against temperature fluctuations.
 You see, the name of the game in espresso is consistency (generally speaking, though there are some exceptions but that’s usually more to do with pressure and flow profiling and is way outside the scope of this post). The group head is tied to the boiler, either by a thermo-siphon, or by physical proximity. Either way, this is why espresso machines take a long time to warm up, because you have to let the group head match the temp of the boiler and the group head is also a massive chunck of metal. Then, that big hunk of metal called a portafilter sits in that group head and equalizes temperature. The idea here is that the water is always the right temp from the moment it leaves the boiler all the way into the cup. This is important for consistent extraction. Leaving the portafilter on the group head keeps the area where water and coffee mix the right temperature. All of that thermal capacity helps keep everything stable.
So how does one “mishandle” a portafilter? Leave it out of the group head or rinse it with tap water. Ideally, the barista will remove the portalfilter, quickly prep the puck, pull a shot, knock the puck out of the portafilter, wipe it down with a towel, and place it back in the group head. If a rinse is really needed, do it with brew water out of the brew head.
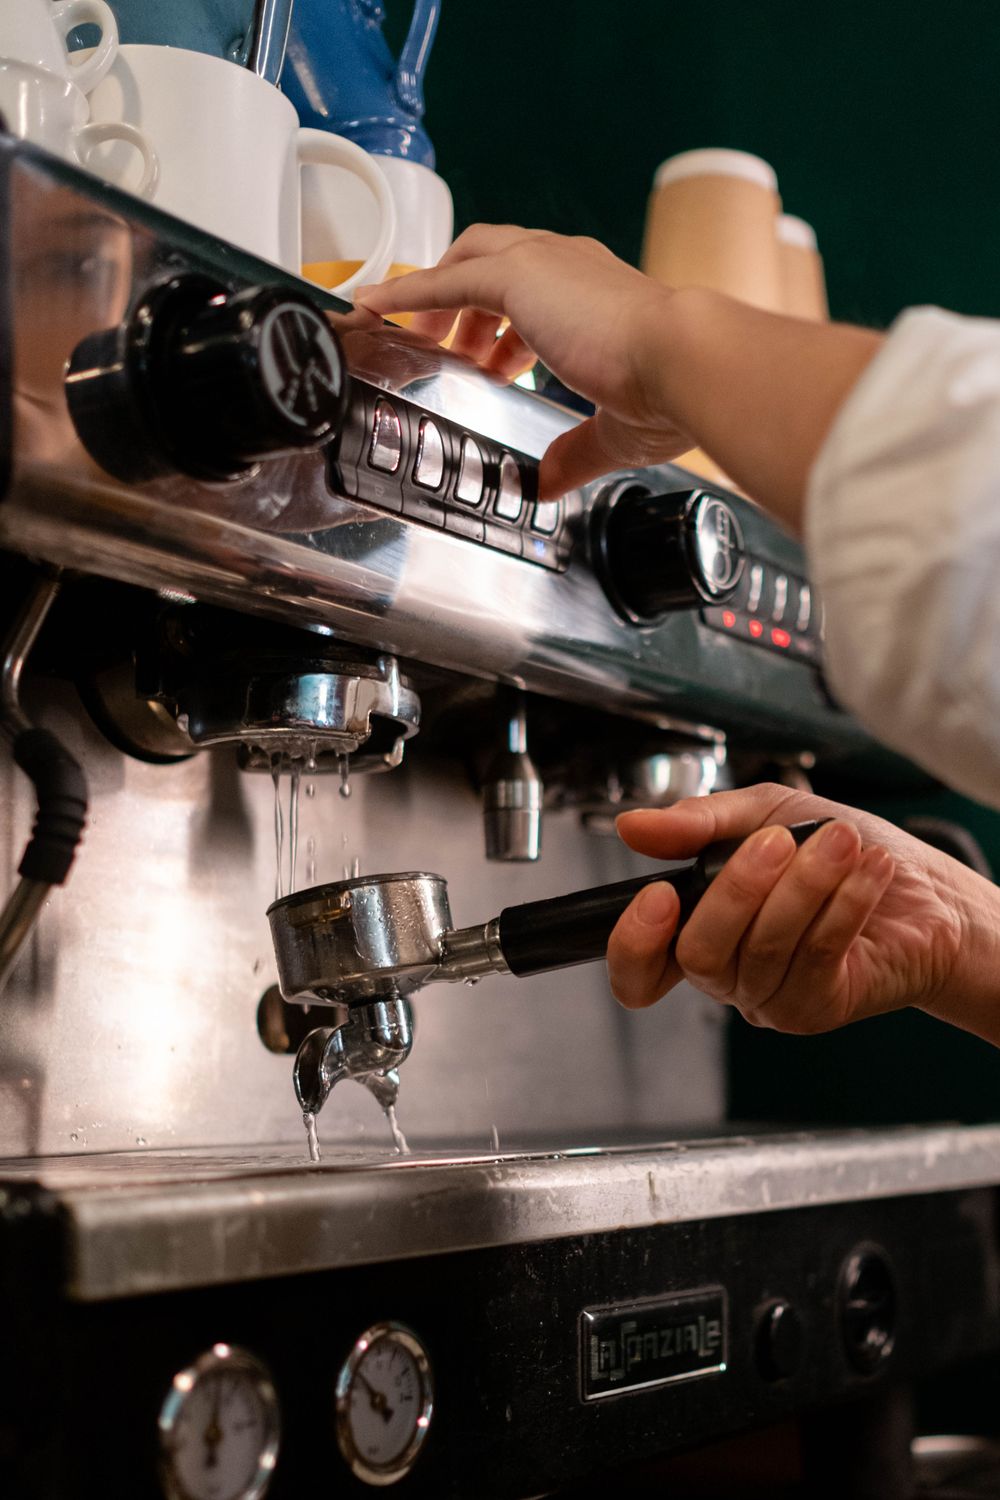
If you walk into a coffee shop and see the portalfilter just hanging around sitting on a counter or on the drip plate, do yourself a favor and just order a drip coffee. If you see the barista do something like rinse the portafilter in the sink, skip the espresso based beverage and grab a drip coffee.
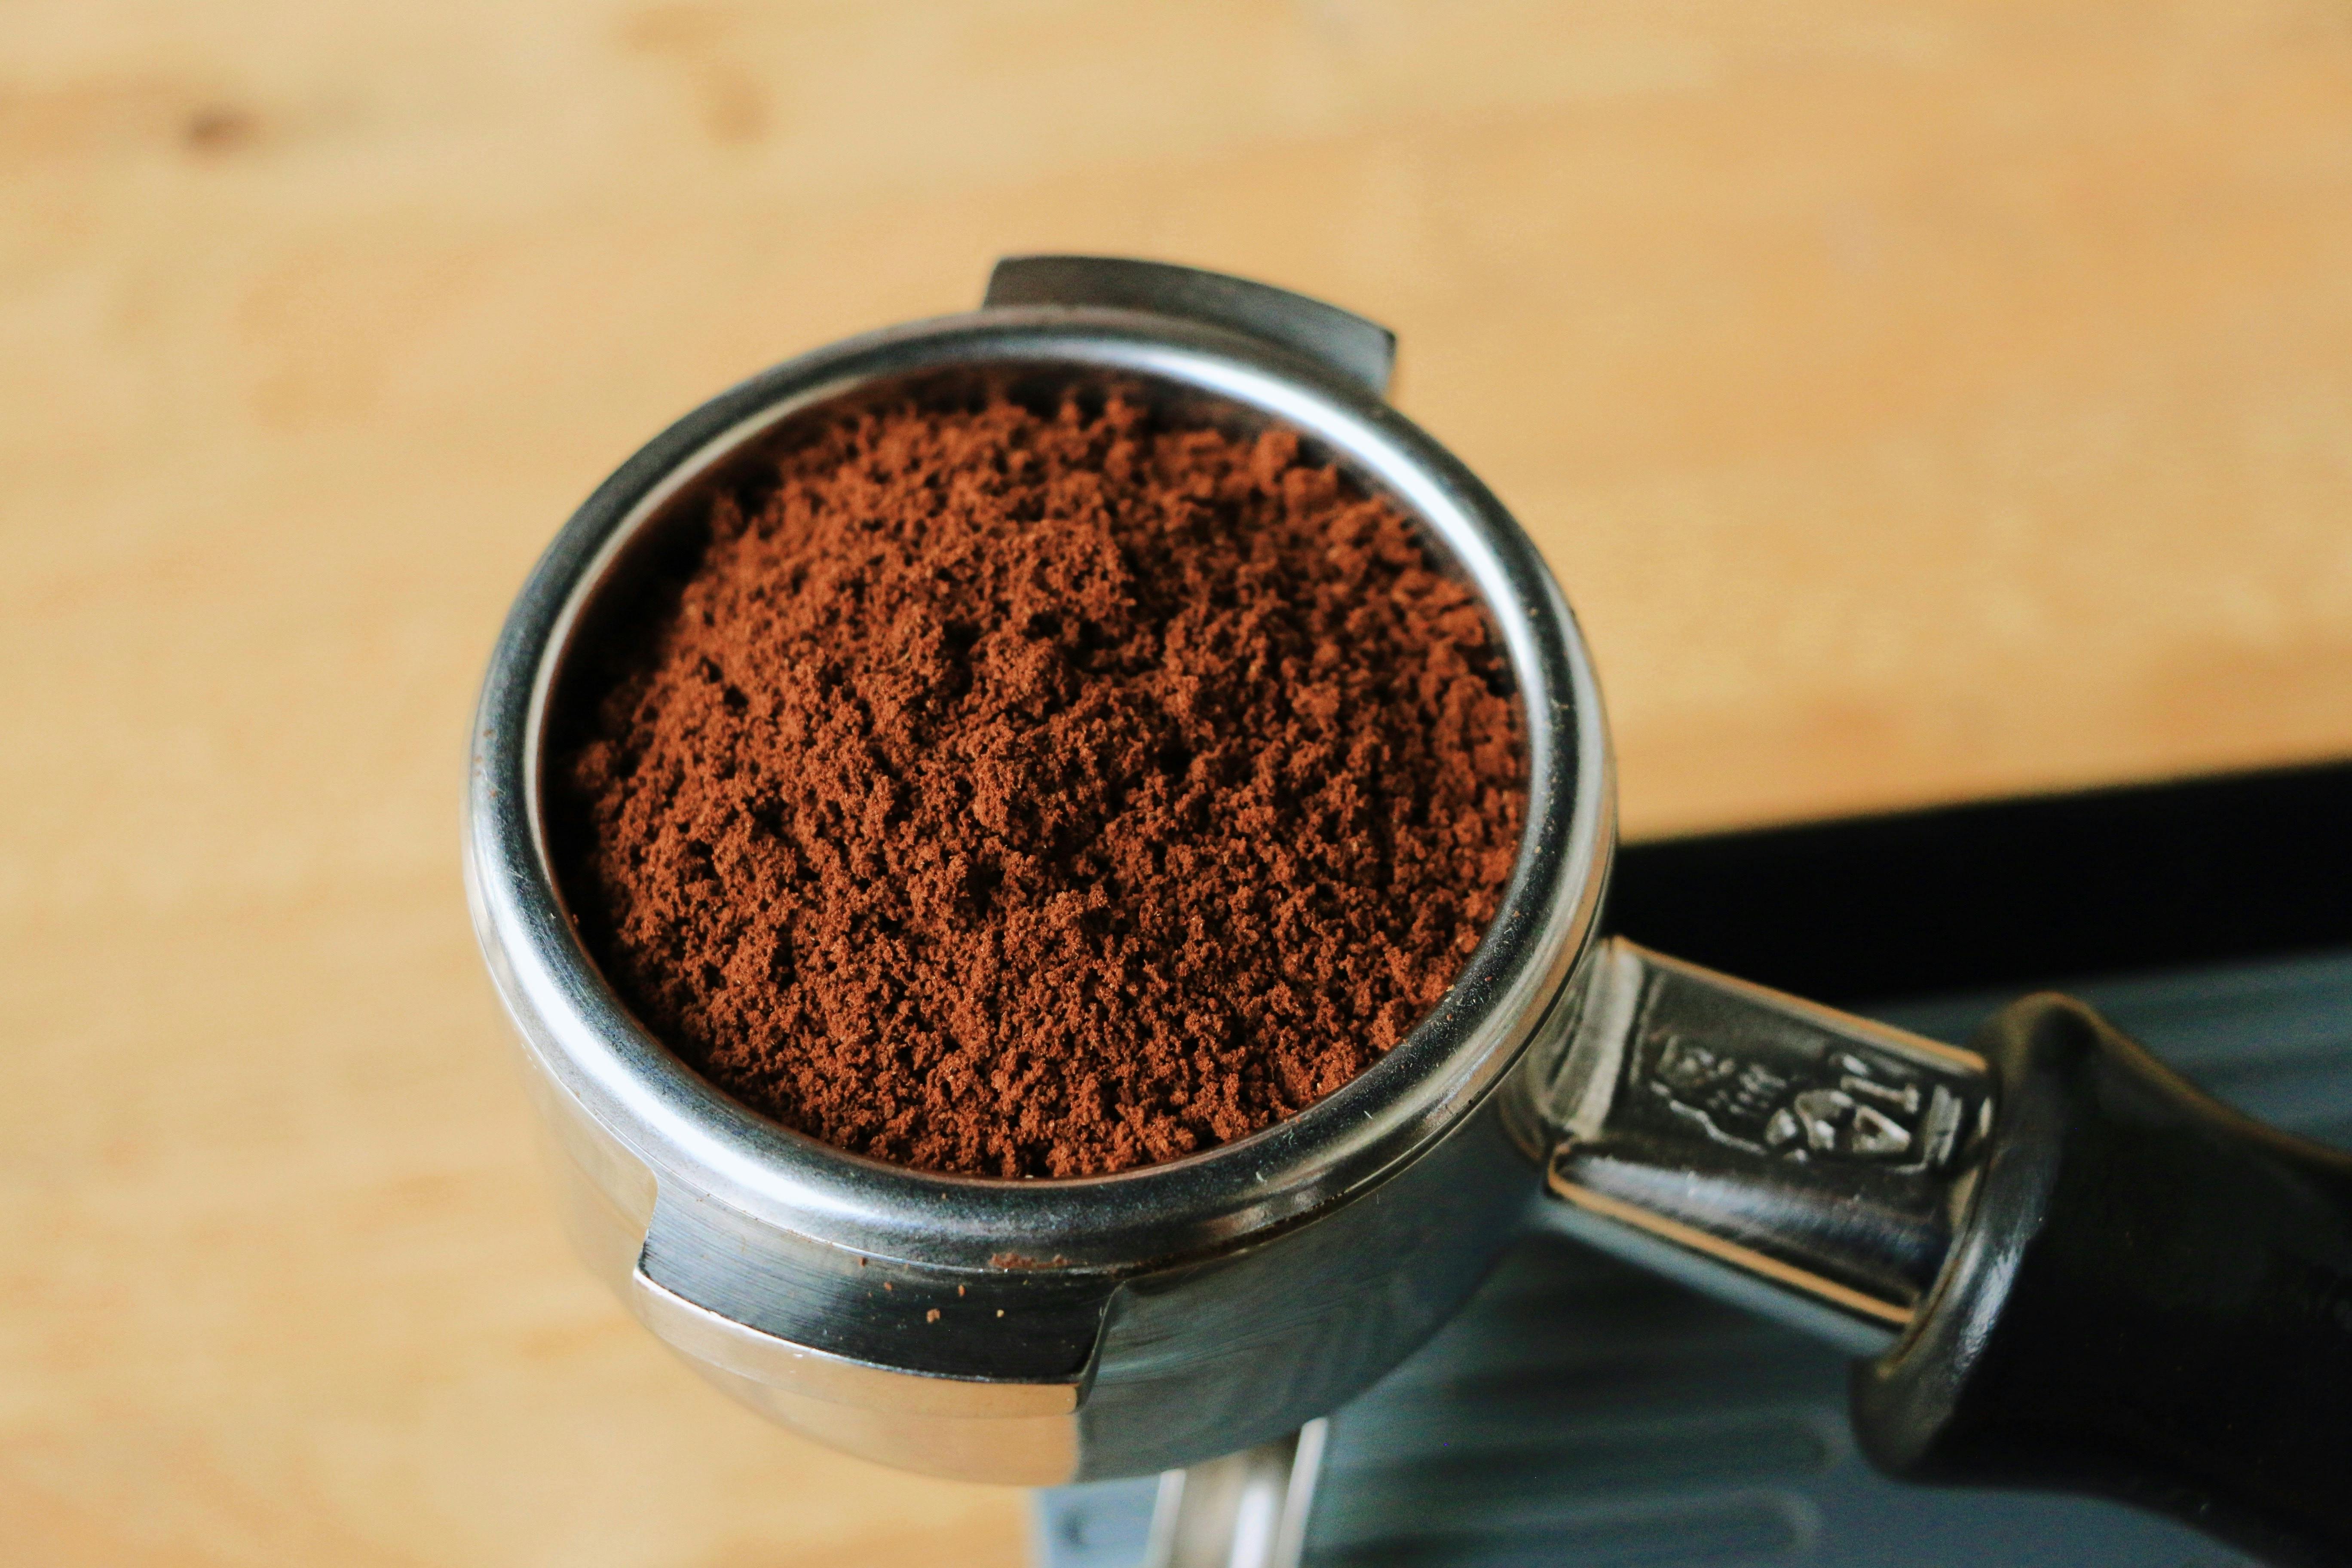
1:2, 20 grams in and 40 grams out (18g in and 36g out for smaller portafilter baskets). That’s a great place to start for any roast and it’s where I point people when they’re starting out. What it means is you put 20 grams of ground coffee into the portafilter and you pull the shot until you have 40 grams of espresso in your cup. Consistency is key, remember? So if you stick to a 20g dose and adjust your grind so you get 40g out in 18-20s you should be in a great place.
In the old days they used to fill the portafilter until it was heaping over the top then level it by knocking the excess off with a swipe of their finger. Super precise. They would also base their shot purely on time. In fact, many commercial machines still have programable single and double shots based on time. Really good baristas can still make this work but the chances of getting a bad shot are much higher. The time based shot should still get it in the ballpark provided everything else is consistent, but that dosing method of old has to be let out to pasture.
These days, commercial grinders come with built in scales. You pop the portafilter into the holder, press it to activate the grinder, and the grinder just does its thing and shuts off at the preset weight. Even if a shop has older grinders that don’t operate by weight, external scales are cheap and plentiful these days. There’s simply no excuse for playing the old guessing game anymore.

So watch the barista when you walk into the next shop. If you see a doser and no scale, just ask for a drip coffee.
When you pull that lever (or push the button) water hits that puck at a pressure of 9 bar. That’s about 130psi. There needs to be enough resistance such that it takes 20-ish seconds for 40 grams of water to pass. Moreover, you want that water to evenly saturate the whole puck and pass over all of the grinds rather than channel through it in a few specific spots. If channeling happens, the grinds in the channel will be over extracted while the rest will be under extracted.
Again, we find ourselves discussing consistency. The grind needs to be consistent, the distribution of grinds must be consistent, and the compactness across the puck has to be consistent. So when you walk in you should see at least two things: a burr grinder and a distribution tool. In the best case you’ll also see a nice tamper but there’s a lot of debate amongst the best baristas as to whether or not the tamper still has a place.

What you don’t want to see is clumpy mounds of coffee grinds piling into a portafilter and then a barista just throwing a tamper on top and pressing away. That’s just a recipe for uneven distribution and channeling galore.
Milk steaming is a whole art form of itself. It’s almost as if the first art one must master is espresso and the second art is steaming milk.

Milk is fickle. There’s a narrow, about 10 degree Fahrenheit, window where the milk takes on a natural sweetness. Any lower or higher and that sweetness is lost. It doesn’t take long to get there either. My Rocket Espresso Mozzafiato will steam a six ounce pitcher in about 18 seconds. Frothing, or texturing, should be done at the very beginning and will only take about three seconds on any machine with a dedicated steam boiler. The whole thing is a very quick process and most baristas will feel the temperature with one hand on the bottom and side of the pitcher.
What I see all too often is a barista over-aerate the milk for a few seconds, then set the pitcher down and let it continue to steam while they do something else. If you see this, walk away.
I spent Friday night and Saturday morning falling down the rabbit hole of broken docs. Every time I update one code snippet I stumble on another that’s broken. I’m not mad. I enjoy documentation. I’m broken, I know, but I really do enjoy it. There’s no better way to solidify your knowledge on a subject than to teach others. The medical field used to have a saying: “See one, do one, teach one.”
Whether or not I’m enjoying wasting my Saturday morning fixing broken docs is irrelevant. I’m here because I got an email from a data service provider my customer has told to integrate with my application. This individual innocently and politely asked for help as they were attempting to use our example in our docs and it wasn’t working. After reviewing, I had to inform them in front of my customer that our docs are out of date and that he needed to change his commands.
It was a bad look and it can be embarrassing. When a dev team leaves the task of documentation for after the feature development, documentation often gets forgotten or pushed to the right as more pressing matters come up. This trend continues until one day you find that more than half of your docs are out of date.
The solution is to push documentation to the left! When are updated docs on a feature needed? When that feature code goes live. However, if you wait until the code goes live to publish the updated docs then you’re already behind. For this reason, we’ve implemented a rule that documentation must be completed before the story can be moved to done, the bug ticket can be resolved, and the PR can be merged. In other words, documentation is always part of the acceptance criteria. This adds extra layers of accountability as now every reviewer is also responsible for making sure that documentation is complete before approving.
Pushing documentation to the left is, like all other things, a practice of taking a little more pain up front to avoid a lot later. Give it a try!